The Everest Base Camp Trek is achievable for most reasonably fit people, but it is not an easy walk. The altitude, long walking days, and several days on the trail make it harder than a normal hike. You do not need mountaineering experience, but you do need to prepare your legs and get used to walking for several hours a day.
I’ve trekked to Everest Base Camp and the nearby routes, including Gokyo Lakes and the high passes, more than 100 times. I started there as a porter in my teens. Today, I am a licensed guide and founder of Mountain World Treks and Expedition, with more than three decades of experience on these trails.
People ask me the same things at the start of every season: How hard is it really? How fit do I need to be? What happens if I get sick up there? What should I take with me?
I wrote this guide to answer those questions from what I have learned on the trail. I explain what makes the trek difficult, how I would prepare for it, what to expect from the 14-day route, and the things I tell trekkers before we leave Kathmandu. If you’re already thinking about booking, our Everest Base Camp Trek package has the 14-day itinerary, price, inclusions, and arrangements from arrival to departure.
Everest Base Camp Trek at a Glance: Key Facts
The Everest Base Camp Trek takes 14 days from arrival in Kathmandu to departure, with about 130 km of walking on the standard Lukla-to-Lukla route. The highest point is Kala Patthar at about 5,545 m, while Everest Base Camp itself is at 5,364 m.
| Detail |
What to expect |
| Duration |
14 days |
| Everest Base Camp |
5,364 m |
| Kala Patthar |
About 5,545 m |
| Distance |
Approx. 130 km round trip |
| Daily walking |
Usually 4 to 8 hours |
| Technical climbing |
None required |
| Guide requirement |
Licensed guide required for foreign trekkers on the Everest route |
| Accommodation |
Teahouses and mountain lodges |
| Main challenge |
Altitude, repeated walking and cold |
| Starting point |
Lukla, reached by flight |
| Best seasons |
Spring and autumn |
These figures give you the basic outline, but the distance alone does not tell you how the trek feels. A six-hour walk at home is not the same as a six-hour walk above 4,000 meters. The trail changes as you climb, the air gets thinner, and you are doing the same work again the following day.
That is why I look at the whole trek rather than one number. Walking time, elevation, overnight stops, and how well you recover each day all matter.
What Is the EBC Trek Like?
The EBC trek is a walking journey through the Khumbu rather than a technical climbing expedition. You follow established mountain trails, cross suspension bridges, pass through Sherpa villages, and sleep in teahouses as you gradually make your way toward Everest Base Camp.
People sometimes hear “Everest” and imagine ropes, ice axes, and climbing equipment. The standard trek is different. You do not need mountaineering experience, and there is no technical climbing on the normal route to Base Camp.
A typical day starts with breakfast at a teahouse, followed by several hours of walking toward the next village. You stop for lunch along the trail and continue in the afternoon before settling into your lodge for the evening. As you climb higher, the villages become smaller and the landscape changes from forest to open, rocky country.
The difficulty comes from the conditions rather than technical climbing. You are carrying a daypack, walking on uneven ground, and spending more nights at higher elevations. Someone who is strong at home can still find the Khumbu tiring if they are not used to long days on their feet.
I have guided people from many different backgrounds on this route. Some were regular hikers, while others had never done a Himalayan trek before. They do not all find the same sections difficult, which is why I prefer to prepare people for the actual conditions rather than tell them that fitness alone will decide how the trek goes.
How Hard Is the Trek to Everest Base Camp?
I would rate the Everest Base Camp Trek as moderate to challenging. The trail is not technically difficult, but the combination of elevation, long days, uneven terrain, stone steps, and cold makes it considerably harder than an ordinary hiking trip.
The physical difficulty changes as you go higher. The lower sections through the Khumbu are easier to handle, while the days around Dingboche, Lobuche, and Gorak Shep demand more from your body.
You will climb and descend many stone steps, cross uneven sections of trail, and spend several hours walking on consecutive days. The return journey also has its own demands. Even when you are losing elevation, there are still uphill sections, and your legs have already worked hard for more than a week.
The biggest difference from hiking at home is the elevation. You cannot judge a day simply by its distance. A relatively short climb can take much longer when you are above 4,000 meters, and you may need more breaks than you expected.
You do not need to be an athlete to complete EBC. You need enough endurance to keep walking for several hours, enough leg strength for the climbs and descents, and enough patience to let your body adjust as you go higher.
How to Prepare for Everest Trekking
The best preparation is regular walking, hill or stair training, leg strength, and some back-to-back walking days. If you have around eight to twelve weeks, you can build a useful base without turning your preparation into an extreme fitness program.
If you already walk regularly, start increasing the distance and include hills whenever possible. If you live somewhere flat, stairs and incline walking are useful substitutes. The goal is to make several hours of walking feel normal before you arrive in Nepal.
Do not train only uphill. The downhill sections can be hard on your thighs, knees, and ankles, especially after several days on the trail. Include descents in your training when you can.
I also like trekkers to do some back-to-back walking before the trip. You do not need to spend every weekend in the mountains, but walking for several hours on Saturday and again on Sunday gives you an idea of how your legs feel when they have not fully recovered.
Simple strength work can help too. Squats, lunges, step-ups, and calf raises are enough for most people. You do not need a complicated gym program.
Use your actual trekking boots during training as well. Walk long enough in them to find out whether they rub, pinch, or cause problems. A boot that feels comfortable for 30 minutes in a shop can feel very different after four or five hours on the trail.
For the rest of your equipment, see our Everest Base Camp Trek Packing List.
Best Time to Trek to Everest Base Camp
Spring and autumn are the main trekking seasons for EBC, with generally better mountain visibility and more settled trail conditions. March to May and late September to November are the periods I normally recommend to trekkers coming for their first Everest trek.
Spring, March to May, brings longer days and generally good conditions. The lower sections become greener, and rhododendrons bloom in many areas. April is also a busy month because of the Everest climbing season.
Autumn, late September to November, is my favorite time to guide. The monsoon has cleared much of the dust and haze, and the mountains can look very sharp. October is usually busy, so popular teahouses and flights can be in high demand.
Winter, December to February, is quieter but much colder. Snow can affect the higher trail, and nights around Lobuche and Gorak Shep can be particularly cold. Trekkers who are properly equipped and comfortable with winter conditions can still do the trek.
Monsoon, June to August, is less predictable for the standard EBC route. Rain, clouds, and flight disruption can make the journey more complicated. The lower valleys are green during this period, but mountain views are less reliable.
For a more detailed month-by-month look at conditions, see our Best Time to Trek Everest Base Camp Guide.
Everest Base Camp Altitude and Acclimatization
Altitude is the part of the EBC trek that needs the most attention. You start much lower at Lukla and gradually spend nights at higher elevations, with acclimatization days in Namche Bazaar and Dingboche before continuing toward Lobuche and Gorak Shep.
The standard route starts at about 2,860 meters in Lukla and climbs through Namche Bazaar, Tengboche, Dingboche, and Lobuche. By the time you reach Gorak Shep, you are sleeping at 5,164 meters.
Your body needs time to adjust to the thinner air. That is why the itinerary does not simply move higher every day. At Namche and Dingboche, you spend an additional night and take a daytime hike to a higher elevation before returning to sleep at the same place.
Altitude sickness can affect anyone. Headache, nausea, dizziness, unusual tiredness, loss of appetite, and poor sleep can occur as you climb. Mild symptoms can happen during acclimatization, but worsening symptoms should never be ignored.
The most important thing is to tell your guide what you are feeling. I would much rather know about a headache or loss of appetite early than have someone hide it because they are afraid the trek might be stopped.
I have seen very fit trekkers struggle at altitude and less experienced walkers do well. Your fitness helps with the physical work, but it does not tell you exactly how your body will react at 4,000 or 5,000 meters.
For more about symptoms, prevention, and what happens when altitude sickness becomes serious, see our Everest Base Camp Altitude Sickness Guide.
Everest Base Camp Trek Itinerary: Day by Day
The standard 14-day EBC itinerary gives you time to travel from Kathmandu to Lukla, walk through the Khumbu, reach Everest Base Camp and Kala Patthar, and return to Kathmandu without removing the main acclimatization days.
The exact overnight stops can vary between trekking companies, but the following is the 14-day route we use for this package. The walking distances, elevations, and times below match the itinerary on our package page.
Day 1: Arrival in Kathmandu 1,400 m | No walking
You arrive in Kathmandu and transfer to your hotel at around 1,400 meters. This is a relaxed day after your international flight, with time to settle in and prepare for the trek.
We normally check your trekking equipment and go through the itinerary with you. If anything is missing, Kathmandu is the right place to arrange it before heading toward the mountains.
Day 2: Fly to Lukla and Trek to Phakding (2,652 m | 3 to 4 hours | 8 km)
The day begins with the flight to Lukla. After landing, you meet the local team, organize the luggage, and start walking toward Phakding.
The trail follows the Dudh Koshi through small villages and forested sections. It is a relatively short first day, which gives you time to settle into the trail rather than starting with a long walk.
Day 3: Trek from Phakding to Namche Bazaar (3,440 m | 6 to 7 hours | 12 km)
The trail continues along the Dudh Koshi, crossing suspension bridges and passing through villages and forest. You gradually make your way toward the entrance to Sagarmatha National Park before the main climb to Namche begins.
The final section is a steady uphill climb. Namche sits at 3,440 meters and is the main trading and meeting town of the Khumbu. This is where you begin spending more time at elevation.
Day 4: Acclimatization Day at Namche Bazaar (3,880 m | 3 to 4 hours | 6 km)
You spend a second night in Namche and take a hike toward the Everest View Hotel and surrounding viewpoints, reaching about 3,880 meters before returning to Namche.
The hike gives you a chance to see the surrounding peaks and spend some daytime hours at a higher elevation without changing your sleeping altitude. You can also use the afternoon to explore Namche or rest at the lodge.
Day 5: Trek from Namche Bazaar to Debuche via Tengboche (3,820 m | 6 to 7 hours | 13 km)
You leave Namche and follow the trail along the mountainside before descending toward the river. From there, the route climbs toward Tengboche, where the famous monastery stands above the surrounding valley.
After spending some time around Tengboche, you continue through the forest to Debuche, where you spend the night at 3,820 meters.
Day 6: Trek from Debuche to Dingboche (4,410 m | 5 to 6 hours | 9 km)
The forest becomes thinner as you move higher into the Khumbu. The trail passes through Pangboche and continues toward Dingboche, with the mountains becoming more dominant around you.
Dingboche is at 4,410 meters, so this is the first night of the trek above 4,000 meters. The distance is not particularly long, but the elevation changes how the walking feels.
Day 7: Acclimatization Day at Dingboche (4,410 m | 3 to 4 hours | 5 km)
You spend another night in Dingboche and take a short hike into the surrounding hills. The exact route can depend on weather, trail conditions, and how the group is feeling.
The purpose is to spend some time higher during the day and then return to Dingboche to sleep. After the hike, there is time to rest, eat, and prepare for the higher sections ahead.
Day 8: Trek from Dingboche to Lobuche (4,910 m | 5 to 6 hours | 9 km)
The trail becomes more open and rocky as you leave Dingboche. You continue through the upper Khumbu toward the memorial area dedicated to climbers and Sherpas who lost their lives in the Everest region.
Lobuche is at 4,910 meters. At this elevation, even a moderate climb takes more effort than it would lower down, so the day usually feels very different from the first few days of the trek.
Day 9: Trek to Everest Base Camp via Gorak Shep (Gorak Shep 5,164 m / Base Camp 5,364 m | 7 to 8 hours | 12 km)
You leave Lobuche and continue toward Gorak Shep. After reaching Gorak Shep at 5,164 meters and leaving your belongings at the lodge, you continue toward Everest Base Camp at 5,364 meters.
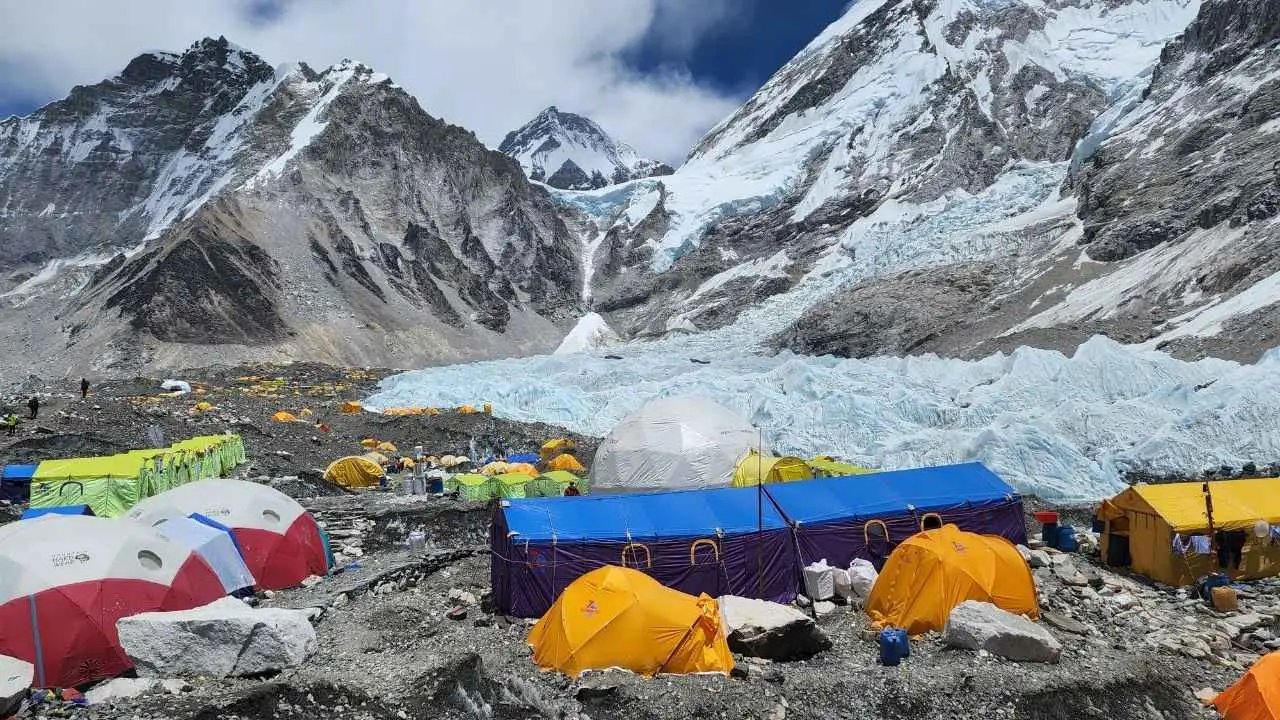
The trail becomes rougher as you approach the Khumbu Glacier and moraine. After reaching Base Camp, you return to Gorak Shep for the night, making this one of the longest days of the trek.
Day 10: Hike to Kala Patthar and Trek to Pheriche (Kala Patthar 5,545 m / Pheriche 4,250 m | 7 to 8 hours | 16 km)
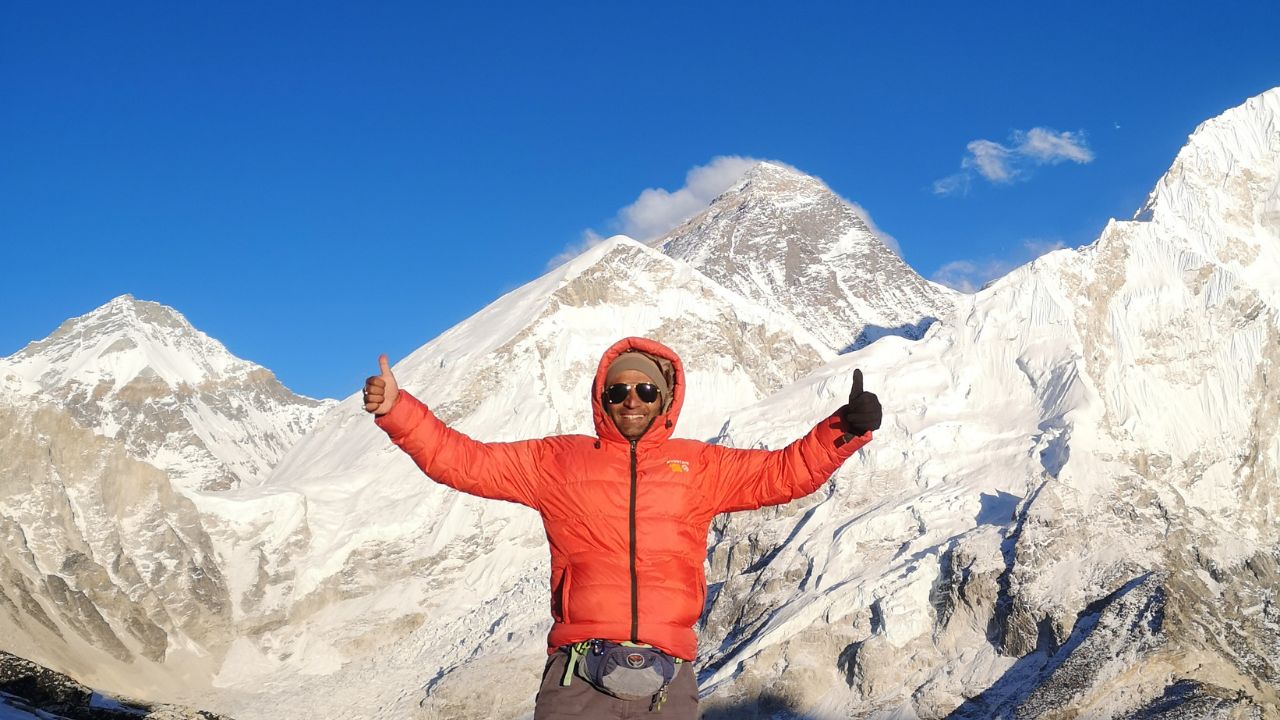
The day starts early with the climb to Kala Patthar, the highest point of the trek at about 5,545 meters. From the top, you have the wide mountain views that many people expect when they think about Everest.
After returning to Gorak Shep for breakfast, you begin the long descent toward Pheriche. By the time you reach 4,250 meters, the lower elevation is usually noticeable in your breathing, although the 16 km day is still a long one.
Day 11: Trek from Pheriche to Namche Bazaar (3,440 m | 6 to 7 hours | 19 km)
You continue down the Khumbu through the villages you passed earlier in the trek. The trail takes you through Tengboche and back toward Namche.
The lower elevation makes the air feel different from the days around Gorak Shep and Lobuche. Even so, 19 km is a long walking day, so most trekkers are ready for a proper rest when they reach Namche.
Day 12: Trek from Namche Bazaar to Lukla (2,860 m | 7 to 8 hours | 20 km).
This is the final walking day and one of the longest, covering about 20 km to Lukla. You follow the Dudh Koshi valley back through the villages and suspension bridges from the beginning of the trek.
There are still uphill sections despite the overall loss of elevation. When you reach Lukla, the walking part of the Everest Base Camp journey is finished.
Day 13: Fly from Lukla to Kathmandu (1,400 m | No walking)
You head to Lukla airport for the flight back to Kathmandu. The flight depends on mountain weather and operating conditions, so the departure time can change.
After arriving in Kathmandu, you have the rest of the day to rest or spend some time in the city before your international departure.
Day 14: Departure from Kathmandu (1,400 m | No walking)
Your Everest Base Camp journey ends today. Depending on your international flight schedule, you may have some free time in Kathmandu before the airport transfer.
Our team arranges the transfer according to your flight schedule.
Do You Need a Guide and Porter for the EBC Trek?
Foreign trekkers on the Everest Base Camp route need to trek with a licensed guide and obtain the required trekking documentation through a registered trekking agency. A porter is optional, but I recommend one for many first-time trekkers.
A guide and a porter have different jobs. The guide leads the trek, manages the daily arrangements, watches how the group is doing, and helps deal with problems along the route. A porter mainly carries your main luggage.
With a porter, you can walk with a smaller daypack containing water, snacks, an extra layer, sunscreen, personal medication, and other things you need during the day. This becomes especially useful during the higher sections.
Before booking, check exactly what your trekking package includes. Ask about the guide, porter, luggage allowance, accommodation, meals, and permits rather than assuming everything is covered because the company advertises a 14-day trek.
Everest Trekking Permits and Requirements
For the standard Everest Base Camp trek, you need the Sagarmatha National Park entry permit, the Khumbu Pasang Lhamu Rural Municipality permit, and the required TIMS card arranged through your trekking agency.
The Sagarmatha National Park permit covers entry into the protected area, while the Khumbu Pasang Lhamu Rural Municipality permit applies to the local government area of the Everest region.
The TIMS card is also part of the trekking requirements for foreign visitors on the Everest Base Camp route. For a guided trek, your registered trekking agency normally handles the permit and TIMS arrangements.
You should still make sure your passport information is correct before the paperwork is prepared. Your agency should also explain which permits are included in your package rather than leaving you to work this out after arriving in Nepal.
Everest Base Camp Packing List: What to Bring
You do not need to bring a huge amount of equipment for EBC. Good trekking boots, warm layers, a proper sleeping bag, protection from sun and cold, and a manageable daypack are more useful than carrying things you may never use.
I’ve seen trekkers arrive with bags much larger than they need. It is understandable because people worry about the cold, but unnecessary weight becomes something you carry every day.
Your clothing should include a moisture-wicking base layer, insulating layers, a warm down or synthetic jacket, and a waterproof outer layer. You will also need trekking trousers, thermal clothing for cold nights, warm gloves, a hat, and sun protection.
Your boots deserve particular attention. Wear them on your longer training walks before the trek. The trail is not the place to discover that a new pair causes blisters after four hours.
If you are using a porter, your daypack can stay relatively small. Keep your water, snacks, sunscreen, sunglasses, extra layer, rain protection, personal medication, and other daytime essentials with you.
For the complete equipment list, see our Everest Base Camp Trek Packing List.
Food and Accommodation on the Everest Trail
The EBC route is a teahouse trek, so you sleep in mountain lodges and eat in their dining rooms rather than camping. Accommodation becomes simpler at higher elevations, while the choice of food also becomes more limited as you get closer to Gorak Shep.
Most rooms are basic, with beds and mattresses and shared bathroom facilities. The dining room is normally the warmest place in the lodge because a stove is used there in the evening.
Dal bhat is one of the most practical meals on the trail because it is filling and widely available. Rice, lentils, vegetables, noodles, potatoes, eggs, soup, and pancakes are also common.
Higher up, prices increase because food, fuel, and other supplies have to be carried or transported into the mountains. Charging, hot showers, and Wi-Fi can also become more expensive and less reliable.
Your appetite may change as you gain elevation. Some people do not feel very hungry at high altitude even though they are using plenty of energy. I still encourage trekkers to eat regularly and drink enough throughout the day.
How Much Does the Everest Base Camp Trek Cost?
Our standard 14-day Everest Base Camp Trek package costs US$1,399 per person, covering the trip from arrival in Kathmandu through the trek and back to departure. The important thing when comparing EBC prices is to check exactly what each company includes.
What our US$1,399 package includes
- Airport arrival and departure transfers in Kathmandu
- Hotel accommodation in Kathmandu as specified in the itinerary
- Kathmandu to Lukla and Lukla to Kathmandu flights
- Licensed English-speaking trekking guide
- Porter service
- Guide and porter food, accommodation and insurance
- Teahouse accommodation during the trek
- Meals during the trekking days as specified in the package
- Sagarmatha National Park entry permit
- Khumbu Pasang Lhamu Rural Municipality permit
- TIMS card
- Government taxes and company service charges
- Standard trekking arrangements from arrival to departure
What is not included
- International flights to and from Nepal
- Nepal visa fees
- Travel insurance
- Personal medical expenses
- Emergency helicopter evacuation
- Personal trekking equipment and clothing
- Hot showers, Wi-Fi, and charging where charged separately
- Personal snacks, drinks and other purchases
- Tips for guides and porters
- Any costs caused by delays, cancellations or changes outside the normal itinerary
The exact package inclusions should always be checked before booking because companies use different definitions of “all-inclusive.” A lower advertised price may simply mean that some of these costs are added later.
You should also have travel insurance that specifically covers high-altitude trekking and emergency evacuation.
For the full breakdown, see our Everest Base Camp Trek Cost Guide.
Everest Trekking Safety: Risks and What to Know
The main risks on EBC are altitude illness, cold, dehydration, injuries on uneven ground, and travel disruption. Most problems are easier to deal with when they are reported early rather than hidden until they become serious.
Altitude is the risk I pay the closest attention to because it can affect people who are otherwise fit and healthy. The important thing is not to assume that being strong or experienced at home means you will automatically handle 5,000 meters well.
Cold is another concern at the higher settlements, particularly around Gorak Shep and during the early morning climb to Kala Patthar. Keep your warm layers accessible rather than packed away where you cannot reach them easily.
The trail also puts repeated stress on your feet, ankles, and knees. Uneven stones, steps, and long descents become harder when your legs are tired. Good footwear and sensible movement matter more than trying to finish a section quickly.
Dehydration is easy to overlook because the weather can be cold. Drink regularly and use properly treated, filtered, or boiled water.
If you feel unwell, tell your guide. Do not hide a problem because you are worried about disappointing the group or stopping the trek. I would rather change a plan early than deal with a serious problem higher on the mountain.
Everest Base Camp vs Gokyo vs Three Passes
Choose the standard EBC trek if reaching Everest Base Camp is your main goal. Choose Gokyo if you want to see the Gokyo Lakes and a different side of the Khumbu, and consider the Three Passes route if you are looking for a longer and much more demanding high-altitude trek.
The standard EBC route is the one I normally recommend to people visiting the Khumbu for the first time. It gives you Everest Base Camp and Kala Patthar without adding the difficult high passes.
The Gokyo route takes you into the Gokyo Valley and to the famous glacial lakes and Gokyo Ri. It can also be combined with EBC through Cho La, but that changes the difficulty considerably.
The Three Passes route crosses Kongma La, Cho La, and Renjo La. You spend longer at high elevations and deal with more demanding terrain. I would not choose it simply because it sounds more adventurous.
If you want to compare the routes properly, see our Gokyo Lakes Trek Guide and Everest Three High Passes Trek Guide.
What Surprises First-Time Everest Trekkers?
Most first-time trekkers are surprised by how quickly the landscape changes, how basic the higher teahouses are, how cold it becomes after the sun disappears, and how different Everest Base Camp itself looks from the photographs they have seen.
Everest Base Camp is not the best viewpoint of Everest. It is a rocky area beside the Khumbu Glacier and moraine, and the mountain itself is not seen from the classic angle many people expect. Kala Patthar is where you get the wider mountain view.
The lower trail is also greener than many people imagine. The route begins through forests and villages before gradually opening into the rocky high-altitude landscape around Dingboche and beyond.
Another surprise is how quickly the temperature drops once the sun goes behind the mountains. A place that felt comfortable in the afternoon can become very cold in the evening, especially at higher elevations.
The teahouses can also be more basic than first-time trekkers expect. They provide the essentials: a bed, food, and a place to warm up in the dining room. They are mountain lodges, not city hotels.
My Advice for First-Time Everest Trekkers
After more than three decades of working in the mountains, my advice is simple: prepare properly, give the mountain enough time, and don’t try to prove anything to it.
When I first started as a porter, I was carrying loads on trails that I now know very well. Over the years, I have watched hundreds of trekkers come through the Khumbu, and I have seen that the strongest-looking person is not always the person who finds the trek easiest.
Come prepared to walk. You do not need to arrive in Nepal as a professional athlete, but you should have spent the weeks before the trek getting used to long walks, hills, and being on your feet for several hours.
Do not be embarrassed if you need a break. Do not compare your walking speed with another trekker. The mountain does not care who reaches the lunch stop first. What matters is how you feel at the end of the day and whether you are ready for the next one.
Pay attention to small problems. A blister, headache, loss of appetite, or unusual tiredness is much easier to deal with when you mention it early. I have learned over the years that people often create bigger problems by trying to hide small ones.
And don’t spend the whole trek thinking about reaching Base Camp. The trail through Namche, Tengboche, Dingboche, and the upper Khumbu is the trek too. Look around, talk to the people you meet, and give yourself time to notice where you are.
If you finish the trek healthy, comfortable with what you have experienced, and still happy to spend another day in the mountains, I consider that a successful trek.